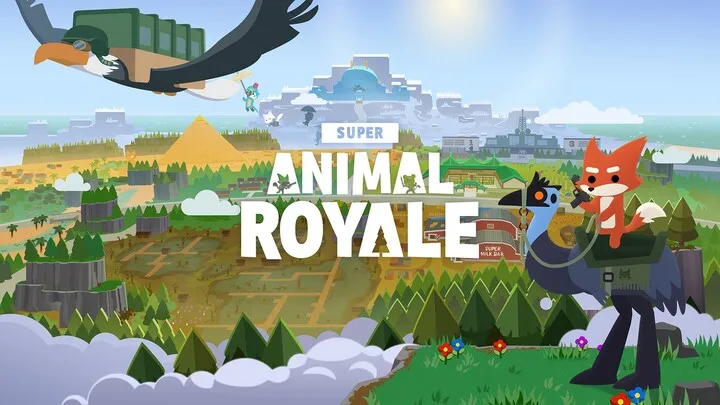
Tactical Ferocity: A Masterclass in Super Animal Royale
Super Animal Royale (SAR) may present itself as a charming, 2D top-down battle royale filled with genetically modified forest creatures, but beneath its "cuddly" exterior lies a mechanically dense competitive shooter. Unlike its 3D counterparts, SAR operates on a unique plane of spatial awareness, where line-of-sight manipulation and projectile lead times dictate the flow of combat. To ascend the food chain and secure the elusive "Super Animal Milestone," a player must transcend basic movement. This guide explores the intricate depths of SAR’s engine, focusing on technical maneuvers, weapon ballistics, and high-level environmental strategies that separate the casual fluff from the apex predators.
1. The Physics of the Roll: Mastering Kinetic Mobility
Mobility in Super Animal Royale is defined by the "Super Roll." While most beginners use the roll merely to move faster across the map, the technical ceiling of this mechanic is found in "Roll-Jumping." By jumping at the precise end-frame of a roll, you maintain a portion of the kinetic momentum, allowing for a faster traversal of the terrain. This is vital for outrunning the Skunk Gas, but its combat applications are even more profound. A well-timed roll can be used to dodge high-velocity sniper rounds, provided you understand the projectile's travel time relative to your roll's invincibility frames.
Furthermore, the roll serves as a tool for "Animation Canceling." When switching weapons or reloading, a roll can often shave off precious milliseconds of recovery time. For example, when using the JAG (Shotgun), rolling immediately after a shot can help reposition you for the next shell while minimizing the time your character remains a static target. Mastering the "Continuous Roll" (chaining rolls with perfect timing) is the first step toward high-tier survival, as a stationary animal is essentially a target dummy for a long-range Bow or Sniper Rifle.
2. Line of Sight and the "Fog of War" Mechanics
SAR utilizes a sophisticated 2D vision system where obstacles like walls, trees, and crates create actual shadows that obscure enemy movements. Mastering the "Corner Peek" is essential. Because the camera is top-down, you can often see the "barrel" of an enemy's gun poking out from behind a crate before their character model is fully visible. High-level players use this to bait shots, forcing an opponent to waste their magazine before initiating a counter-push.
Tactical Obstacle Utilization
- The Tree Dance: Use the circular trunks of trees to constantly break line-of-sight during a 1v1. By rotating opposite to your enemy’s movement, you can force them into a reload or a state of confusion.
- Crate Hopping: While you cannot jump over most obstacles, you can use them to clip your character’s hitbox. Standing at the edge of a crate allows you to fire while keeping 60% of your model obscured from direct line-of-sight.
- Grass Stealth: Standing perfectly still in tall grass makes you invisible unless an enemy is within a very short radius. Use this for "Ambush Trapping" in the late-game circles.
3. Ballistic Science: Lead Times and Projectile Velocity

Every firearm in Super Animal Royale fires a physical projectile; there are no "hitscan" weapons. This means that at medium to long range, you must "lead" your target—firing at the space where the enemy will be, rather than where they are currently. The AK and the M16 have high velocities, requiring minimal lead, whereas the Thomas Gun and the Silenced Pistol require significant prediction. Mastering the "Lead Gap" is the difference between a suppressed enemy and a dead one.
Weapon Class Breakdown
- High-Velocity (AK/M16/Sniper): Best for open-field engagements where the enemy is sprinting.
- Slow-Velocity (Bow/Sparrow Launcher): These weapons are silent and deadly but require extreme prediction. The Sparrow Launcher, in particular, rewards players who can track enemy roll patterns.
- Spread Patterns (JAG/Shotgun): The JAG has a fixed spread. Understanding the "Optimal Kill Distance" (the range where most pellets hit the torso) is crucial for CQC (Close Quarters Combat).
4. The Melee Meta: Precision and "Banana-Peel" Tactics
Melee combat is often overlooked, but the "Super Melee" (swinging while sprinting) provides a slight lunge forward. In the early game, if you find yourself without a gun, the "Stutter-Step Melee" is your best defense. By swinging and immediately rolling backward, you can chip away at an armed opponent’s armor without getting caught in their firing arc. However, the true king of the utility slot is the Banana.
The Banana is not just a joke item; it is a tactical area-denial tool. Placing a banana peel behind a door or at the exit of an alleyway can force an enemy into a "Trip State," which lasts for approximately two seconds. This duration is more than enough to unload an entire SMG clip into a stationary target. Advanced players use bananas to "Chain CC" (Crowd Control), throwing a skunk grenade on a tripped opponent to ensure a guaranteed kill without taking a single point of return damage.
5. Armor Management and the "Tape Economy"
Armor is your most valuable resource, often more important than health. There are three tiers of armor, and each piece can be repaired using "Super Tape." The technical guide to the "Tape Economy" involves knowing when not to repair. If you have Tier 3 armor with only one bar missing, it is often better to save your tape for a Tier 1 or 2 set that is completely broken, as the repair time is static regardless of the armor’s tier.
Armor Interaction Rules
- Durability vs. Protection: All armor tiers provide 100% damage reduction to your health until a bar is broken.
- The "Tape-Roll" Maneuver: You can move slowly while taping. Always tape while behind cover or while oscillating your movement to make yourself a harder target for snipers.
- Loot Prioritization: In the late game, it is often safer to swap a broken Tier 3 armor for a fresh Tier 1 armor if you are out of tape, as that one bar of protection can prevent a "One-Shot" from a Sniper Rifle.
6. Environmental Hazards: Navigating the Skunk Gas and Ice

The Skunk Gas in SAR moves in phases, but unlike 3D Royales, the 2D plane makes it easier to get "Gatekept" by enemies. Mastering the "Edge-Walk" involves staying just inside the safe zone and looking back into the gas. Because players in the gas are highlighted by a purple tint, they are incredibly easy to spot. Use the "Skunk Vial" power-up to increase your movement speed while in the gas, allowing for daring "Flank Maneuvers" that the enemy would never expect.
Ice biomes introduce "Inertia Physics." Movement on ice causes you to slide, which can be a death sentence if you aren't prepared. However, you can use the slide to "Infinite Roll." By rolling on ice, you travel significantly further than on grass. This allows for "Ice-Briting," a technique where you slide-roll around an enemy at high speeds, making it nearly impossible for them to track you with non-automatic weapons.
7. Power-up Synergies: Creating the Apex Build
The "Super Power-ups" (found in crates) define your playstyle. A "Claw" power-up allows you to cut through grass and find more items, which is great for the early game, but "Sneaky Sneakers" or "Ninja Booties" are the endgame meta. These power-ups reduce your footstep noise and the visual "Sound Ripples" on the map. In the final small circles, being silent is your greatest advantage.
Top-Tier Power-up Combos
- The Tank: Level 3 Armor + Bandolier + Skunk Vial. This allows you to stay in the gas longer and carry more tape to outlast the competition.
- The Assassin: Silenced Pistol/Sniper + Ninja Booties + Catnip. The Catnip increases your movement speed near enemies, allowing for quick "In-and-Out" strikes.
- The Scout: Eagle Eye + Claw. Perfect for long-range players who want to spot enemies from across the screen before they even know you’re there.
8. Emu Logistics: Cavalry Combat and Hit-and-Run Tactics
The Giant Emu is the only vehicle/mount in Super Animal Royale, and it functions as both a shield and a weapon. The Emu can "Peck" for significant damage, but its primary utility is the "Emu-Dash." Use the dash to close the distance on an enemy sniper. The Emu will soak up the damage, protecting your precious armor bars. When the Emu's health is low, use the "Dismount-Roll" to launch yourself toward the enemy for a finishing shotgun blast.
Furthermore, there is a technical trick known as "Healing the Bird." If you stand near a campfire while mounted, the Emu will regain health. In squad play, having one player on a "Battle Emu" while others provide covering fire creates a mobile tank that can breach buildings with ease. Just be wary of the "Emu-Trap"—an experienced player will aim for the animal's legs, which have a larger hitbox than the rider, to quickly de-mount you in the middle of an open field.
9. Crate Strategy: Baiting and Objective Control
Super Animal Crates (Supply Drops) are the primary source of Gold-tier weapons like the M16 or the Sniper. However, the smoke trail from a landing crate is visible to everyone on the map. Mastering the "Crate Bait" is a high-level psychological tactic. Instead of looting the crate immediately, place a "Skunk Mine" or a "Banana" near the opening and hide in a nearby bush.
Waiting for the "Loot Sound" is the key. When an enemy begins to loot, they are stationary for a fraction of a second. This is your window to strike. Additionally, the "Mole Courier" provides an alternative source of high-tier loot. Tracking the Mole's burrowing path allows you to intercept the drop before other teams can react. Remember: in SAR, the loot is often a trap, and the best way to get Gold weapons is to take them from the animals you’ve outsmarted.
10. The Final Circle: Spatial Dominance and Skunk Grenades
The endgame circle in Super Animal Royale is often a chaotic mess of bananas and gas. The most important tip for the final 1v1 is "Center-Control." By holding the middle of the circle, you force the enemy to move through the closing gas. Use your "Skunk Grenades" to partition the map. You don't always need to hit the enemy with the grenade; you just need to create a wall of gas that forces them into your line-of-fire.
At this stage, your "Weapon Switch" speed is paramount. If you miss your Sniper shot, do not reload; instantly swap to your SMG or JAG to finish the job. The final circle is a test of who has managed their "Tape Economy" better. If you have full Level 3 armor and the enemy has Tier 1, you can afford to trade shots. Play aggressively if you have the resource advantage, and play like a "Rat" in the grass if you are at a disadvantage. Victory is won by the smartest animal, not necessarily the most aggressive one.
Conclusion
Super Animal Royale is a game of microscopic advantages. From the frame-perfect timing of a roll-jump to the strategic placement of a single banana peel, every action contributes to your survival. By understanding the lead times of your favorite firearms, managing your tape with fiscal discipline, and manipulating the 2D line-of-sight system, you transform the game from a chaotic brawl into a calculated hunt. The mountain of animal remains you leave behind is a testament to your mastery of these systems. So, sharpen your claws, reload your AK, and remember: it's a "furry" world out there, and only the most technical animals make it to the winner’s pedestal.
